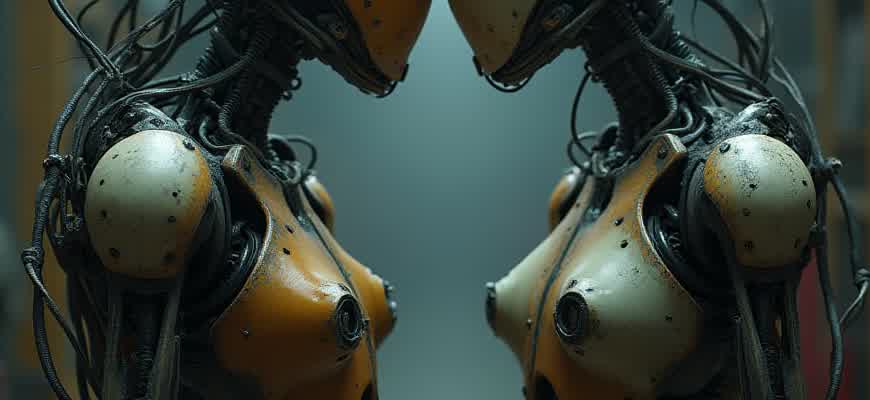
Replace Photo With Another Face
Face replacement in images has become increasingly accessible due to advancements in image editing software. Whether for artistic purposes, creating memes, or enhancing privacy, swapping faces can be done using various methods. These methods generally fall into two categories: manual editing with photo manipulation software and automated face-swapping tools that use AI technology.
Manual Editing Process:
- Select the photo with the original face.
- Choose a second image containing the desired face.
- Use a tool like Photoshop to cut and place the new face over the original one.
- Adjust the alignment, color tone, and texture for a seamless result.
AI-based Face Replacement:
- Upload both images to an AI face-swapping platform.
- The AI detects the facial features and replaces the original face with the new one.
- Fine-tune the output if necessary to ensure realistic blending.
"AI-based tools have simplified the process, enabling even beginners to replace faces with minimal effort, though manual editing still offers a higher level of precision and customization."
Comparing the Approaches:
| Method | Advantages | Disadvantages |
|---|---|---|
| Manual Editing | High precision, full control over details | Time-consuming, requires skill |
| AI-based Tools | Quick and easy, minimal effort needed | May lack accuracy, limited customization |
How to Swap Faces in Photos with Our Service
Our face-swapping tool offers a simple and efficient way to replace one face with another in your photos. Whether you're creating fun edits for social media or need a more professional solution, our platform makes it easy to achieve realistic results. The process requires just a few quick steps, and the interface is intuitive, even for those with little technical experience.
In this guide, we will walk you through the process of swapping faces in your images. You can upload your photos, select the faces, and seamlessly merge them into one cohesive picture. Let’s dive into the simple steps you need to follow to get started!
Steps to Replace Faces in Your Images
- Upload Your Photo: Start by uploading the image you wish to edit. You can do this by clicking the "Upload" button on our platform.
- Select Faces: Once your image is loaded, click on the face you want to swap. Our system will automatically detect the face for you.
- Choose a New Face: Upload the photo containing the face you want to place into the selected area. The system will match and scale it to fit the existing face.
- Adjust Alignment: Make any necessary tweaks to ensure the face fits naturally. Use the provided tools to move, resize, or rotate the new face.
- Finalize and Save: Once you’re satisfied with the result, click the "Save" button to download your edited photo.
Key Features
- Fast face detection and replacement
- High-quality, realistic output
- Easy-to-use interface suitable for all skill levels
- Adjustable facial features for a seamless blend
Note: For the best results, make sure both images are high-quality and that the faces are clearly visible. This will help the system match and swap the faces more accurately.
Comparison Table: Basic vs. Advanced Editing
| Feature | Basic Edit | Advanced Edit |
|---|---|---|
| Face Detection | Automatic | Manual and Automatic |
| Image Quality | Standard | High Resolution |
| Adjustments | Minimal | Full Customization |
| Output Format | JPG, PNG | JPG, PNG, TIFF |
Step-by-Step Guide to Uploading Your Photo for Face Replacement
To begin the process of replacing a face in your photo, it’s essential to ensure that you have a high-quality image ready for upload. The quality of the photo plays a significant role in the success of the face replacement, as clearer images lead to better results. Follow this guide to upload your photo correctly and start editing with ease.
Once you've prepared your photo, the next steps will walk you through uploading it to the face replacement platform. Make sure your internet connection is stable to avoid any interruptions during the process.
How to Upload Your Photo
- Open the Platform: Launch the website or app where the face replacement tool is located.
- Log in: Enter your credentials if required, or sign up for a new account if you don't already have one.
- Find the Upload Section: Locate the button or link that says "Upload Photo" or similar. It’s typically easy to find on the home page.
- Select Your Photo: Click the upload button, and select the photo file you wish to use from your device.
- Confirm Your Selection: After selecting your photo, confirm the upload by clicking the "OK" or "Upload" button.
Important: Make sure the photo you are uploading has a clear and visible face. Low-quality or blurry images may not yield accurate results.
Additional Tips for a Successful Upload
- File Format: Ensure that your image is in a supported format such as JPG, PNG, or GIF.
- Size Limits: Some platforms have file size limits. Be sure to check the maximum allowed file size before uploading.
- Image Orientation: It’s best to upload a photo where the face is well-lit and facing forward for optimal results.
| Photo Requirement | Details |
|---|---|
| Image Quality | Clear, high-resolution image for better face detection. |
| File Format | JPG, PNG, GIF |
| File Size | Check platform’s size restrictions. |
| Face Visibility | Ensure the face is clear and not obscured by shadows. |
Choosing the Right Image for Optimal Face Swapping
When performing face swapping, selecting the right source photo can make a significant difference in the final result. The goal is to ensure that the new face blends naturally with the target image, maintaining realistic proportions and lighting. A poorly chosen photo can lead to distorted outcomes, with misaligned features or unnatural skin tones. Understanding which characteristics to look for in both the source and target images will enhance the overall quality of the face swap.
To achieve the best results, consider various factors such as the face's angle, lighting conditions, and resolution. By selecting high-quality, well-lit images, the process becomes smoother and the results more convincing. Below are a few guidelines on what to look for when choosing the right photos for face swapping.
Key Factors to Consider for a Successful Face Swap
- Face Angle: Ensure the faces in both images are facing in similar directions. A frontal view of the face works best for alignment.
- Lighting Conditions: Both faces should have similar lighting to avoid unrealistic shadows or highlights. A well-lit environment with soft, diffused light works best.
- Resolution and Quality: High-resolution images lead to more accurate and smooth swaps. Low-quality photos may introduce pixelation or blur when adjusted.
- Expression and Pose: Match facial expressions between the two images to maintain natural looks. A relaxed or neutral expression tends to work best.
Common Mistakes to Avoid
- Using images with vastly different facial orientations (e.g., one is profile and the other is frontal).
- Choosing photos with poor lighting, leading to mismatched skin tones or shadows.
- Using low-resolution images that could create rough edges or visible artifacts after the swap.
- Swapping faces with very different facial structures that make it difficult to align the features properly.
Tip: It's always beneficial to start with images that have similar lighting, resolution, and orientation. This can save you a lot of time in the editing process and give you better results overall.
Comparison Table: Best vs. Worst Photo Choices for Face Swapping
| Criteria | Best Choice | Worst Choice |
|---|---|---|
| Face Orientation | Both faces are frontal | One face is profile, the other is frontal |
| Lighting | Soft, diffused lighting with even shadows | Harsh shadows or overexposed light |
| Resolution | High-quality, high-resolution images | Blurry, low-resolution images |
| Facial Expression | Neutral or relaxed expression | Extreme or unusual facial expressions |
Why Image Quality Is Crucial in Face Replacement
When performing face replacement, the quality of the source images significantly impacts the final result. Low-resolution or poorly lit images can lead to distorted or unnatural-looking results. Ensuring that both the face and the target image are of high quality is essential for achieving a seamless blend between the two.
The resolution, lighting, and angle of the images all contribute to the effectiveness of face replacement. If any of these elements are lacking, the algorithm might struggle to match the facial features accurately, resulting in noticeable mismatches or artifacts. Additionally, poor quality can hinder the ability to capture fine details, such as skin texture, shadows, and highlights.
Factors that Affect Image Quality
- Resolution: High-resolution images provide more data for precise face alignment and blending.
- Lighting: Consistent and appropriate lighting helps in maintaining natural shadows and highlights, making the replacement look more realistic.
- Angle and Pose: A face taken from a similar angle and pose to the target image will improve the matching process.
Key Points to Remember
High-quality images ensure better alignment of facial features and smoother integration, leading to a more convincing result.
Image Comparison Table
| Quality Factor | Impact on Face Replacement |
|---|---|
| High Resolution | More detail allows for better facial feature mapping and seamless blending. |
| Proper Lighting | Enhances natural shadows and highlights, aiding in realistic face fusion. |
| Correct Angle | Improves alignment and reduces distortion, ensuring a better match between faces. |
Limitations of Replacing Faces in Photos
When replacing a face in a photo, several challenges arise that limit the effectiveness of the process. These limitations can range from technical difficulties, such as alignment and resolution issues, to more subtle problems like maintaining natural lighting and facial expression consistency. Understanding these constraints is essential for achieving a realistic and convincing result.
Despite advances in AI-driven face-swapping technology, there are still significant hurdles in creating flawless face replacements. The complexity of human features and the variability of different photo conditions make it difficult to achieve perfection in every instance. Below are some of the key limitations that must be considered when altering faces in images.
Key Limitations
- Facial Feature Alignment: Accurate alignment between the original and replaced faces is critical. Misalignment can result in distorted or unnatural images.
- Lighting and Shadows: Ensuring that the lighting on both faces matches the rest of the image is a challenge. A mismatch in lighting can make the replacement face appear out of place.
- Resolution Discrepancies: The resolution of the face being inserted may differ from the original image, leading to blurry or pixelated results.
Complexities of Seamless Integration
- Texture Matching: The skin texture and tones of the original face must match those of the new face to avoid obvious differences.
- Expression Consistency: Facial expressions, such as smiling or frowning, must be replicated accurately for a natural look.
- Contextual Accuracy: The new face must fit the context of the original photo. For example, replacing a face in a group photo might result in awkward positioning or scale issues.
"Achieving a seamless face replacement requires careful attention to detail, especially when it comes to lighting, texture, and expression consistency. Even small errors can disrupt the realism of the image."
Practical Considerations
| Limitation | Impact on Photo Quality |
|---|---|
| Facial Alignment | Distorted or unrealistic appearance |
| Lighting Mismatch | Artificial or jarring effect on the final image |
| Resolution Differences | Blurry or pixelated areas in the swapped face |
How to Adjust the Final Image After Face Swapping
Once the face swap is complete, it is essential to refine and personalize the final image to ensure a realistic and coherent result. Customizing the image involves several steps that can improve the alignment, color matching, and overall appearance of the swapped face. You can make these adjustments manually or use tools designed to streamline the process.
The most crucial aspects to focus on include correcting lighting inconsistencies, adjusting skin tones, and ensuring proper facial alignment with the new face. These refinements can significantly enhance the quality of the final output, creating a seamless integration between the two faces.
Steps for Customizing the Image
- Facial Alignment: Adjust the swapped face to match the angle and size of the original face to avoid unnatural distortions.
- Color Correction: Modify the skin tones and lighting to match the surrounding areas, ensuring a smoother blend between the swapped face and the background.
- Enhancing Details: Focus on features like eyes, lips, and hair to ensure they look natural and integrated into the new image.
Key Considerations
Lighting and shadows play a significant role in creating a realistic face swap. Even subtle differences in light can cause the swapped face to look out of place. Use blending and masking tools to correct these inconsistencies.
Common Tools for Image Customization
| Tool | Function |
|---|---|
| Photoshop | Offers advanced features for color correction, blending, and alignment. |
| GIMP | A free alternative with powerful tools for refining facial features and matching skin tones. |
| FaceApp | Mobile app with face-swapping and automatic adjustment options for enhancing facial details. |
Final Thoughts
- Test and Compare: After adjustments, test the image on different backgrounds to ensure it looks natural across various settings.
- Keep Consistency: Maintain consistent lighting and angles throughout your editing process to avoid jarring discrepancies in the final image.
Security and Privacy: How We Protect Your Uploaded Photos
When uploading your photos, it’s crucial to ensure they are handled securely. Our platform takes comprehensive measures to safeguard your images from unauthorized access and misuse. We employ advanced encryption and privacy protocols to ensure your photos are stored and processed in the safest manner possible.
We understand the importance of privacy when dealing with personal data. That’s why our system is designed to provide you with full control over who sees your images, ensuring that no third party can access your photos without your permission.
Our Security Measures
- End-to-End Encryption: All images are encrypted before they are uploaded, ensuring they are protected during transfer and storage.
- Access Control: Only authorized users and systems can access the uploaded images, with multiple layers of authentication.
- Data Anonymization: Sensitive information, such as metadata, is stripped from your photos to enhance privacy.
Your Privacy is Our Priority
We take strict measures to guarantee that your personal data stays protected. All photos you upload are stored on secure servers with restricted access.
Important: We never share or sell your images to any third parties without your explicit consent.
How We Manage Your Photos
- Your photos are stored in encrypted format, ensuring only you can access them with your account credentials.
- We periodically review our security protocols to stay ahead of potential threats and vulnerabilities.
- Our servers are housed in data centers with top-tier physical security to prevent unauthorized access.
Security Features Overview
| Security Feature | Description |
|---|---|
| Encryption | All images are encrypted during both upload and storage. |
| Access Control | Only authorized personnel and systems can access the images. |
| Data Anonymization | Metadata and other sensitive information are removed from your photos. |
Cost Breakdown: How Much Does Replacing a Face in a Photo Really Cost?
Replacing a face in a photo has become an increasingly popular service in digital image editing. With advancements in technology, the process has become more accessible, but the price can vary widely depending on several factors. For individuals seeking to swap faces in their images, it’s important to understand the components that contribute to the cost.
The price range for replacing a face in a photo can depend on the complexity of the work, the quality of the final result, and the platform or service used. There are a few key considerations to keep in mind before deciding on a service provider.
Factors Influencing the Cost
- Image Quality: Higher-resolution photos require more precise editing, which can increase costs.
- Complexity of the Task: Simple face swaps may be cheaper, while detailed adjustments (e.g., matching lighting, shadows, and skin tones) will raise the price.
- Experience of the Editor: Professionals with years of experience tend to charge more for their services.
- Delivery Time: Rush orders often incur additional fees.
Estimated Pricing Breakdown
| Service Type | Price Range |
|---|---|
| Basic Face Swap (Low Complexity) | $20 - $50 |
| Advanced Face Swap (High Complexity) | $50 - $150 |
| Professional Face Replacement (Detailed Work) | $150 - $500+ |
Note: Always ask for a portfolio or sample images before committing to an expensive service to ensure the results meet your expectations.
Additional Costs to Consider
- Revisions: Some services include one free revision, while others may charge an additional fee for each change requested.
- Software Fees: Professional-grade software used by editors might also contribute to higher costs.