Beautyplus Ai Photo Editor
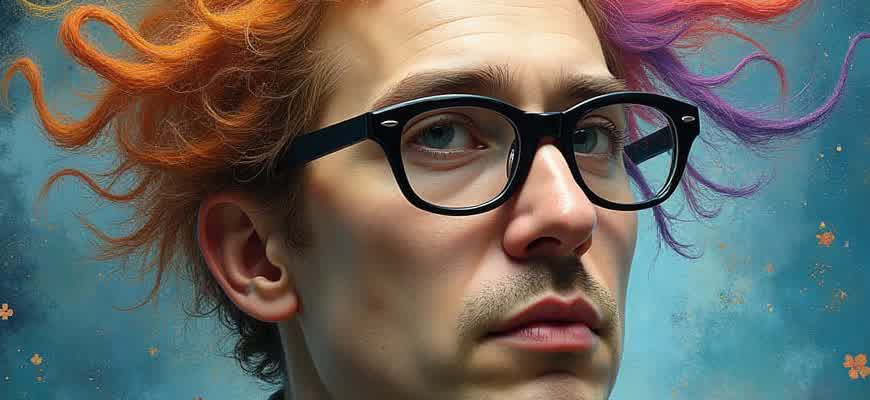
The Beautyplus AI Photo Editor is a powerful tool designed to enhance and refine digital photos using artificial intelligence. With its intuitive interface and smart editing features, it has become a popular choice for users looking to improve their selfies, portraits, and everyday snapshots.
Key Features of Beautyplus AI Photo Editor:
- Automatic Retouching: The AI-powered system automatically detects facial features and adjusts lighting, skin tone, and texture for a flawless finish.
- Real-Time Previews: Users can see the effects applied to their photos in real-time, ensuring they achieve the desired results instantly.
- Advanced Filters and Effects: A wide range of filters and artistic effects allow for personalized editing, from natural beauty enhancements to creative artistic transformations.
"With the beauty-enhancing power of AI, the Beautyplus Photo Editor transforms photos effortlessly, giving users a chance to express themselves through polished, professional-looking images."
How It Works:
- Select a photo from your gallery or take a new selfie.
- Apply AI-powered adjustments like smoothing skin, whitening teeth, or brightening eyes.
- Customize your image further using manual editing tools and filters.
- Save or share your enhanced photo directly from the app.
| Feature | Description |
|---|---|
| AI Skin Smoothing | Automatically smoothens skin texture and removes imperfections. |
| Eye Enlargement | Enhances eye size and brightness for a more captivating look. |
| Real-Time Preview | Instantly view the results of applied filters and adjustments. |
Effortlessly Enhance Portraits with Instant Background Removal in Beautyplus AI
With the Beautyplus AI Photo Editor, transforming your portraits into professional-looking images has never been easier. One of the standout features is the tool’s ability to instantly remove or change the background with a single click. This feature allows users to quickly isolate the subject of their photos, creating a clean and polished result without needing advanced editing skills.
The AI-powered background removal process is incredibly accurate, ensuring that even complex details like hair and edges are seamlessly handled. This function is perfect for those who want to elevate their portraits, whether for social media, portfolios, or personal projects. Let’s dive into the advantages and functionalities that make this tool indispensable for photographers and casual users alike.
Key Benefits of Background Removal in Beautyplus AI
- Speed and Simplicity: Achieve professional-level results with just one click.
- AI-Powered Precision: The tool uses advanced algorithms to detect and remove backgrounds without cutting off fine details.
- Customizable Options: After background removal, users can add a new backdrop or use various pre-designed templates.
“Removing the background is so simple. I no longer need to spend hours on complicated software–Beautyplus AI does it in seconds.” – User Testimonial
How It Works
- Upload Your Image: Choose the photo you want to edit and upload it to the app.
- Click the Background Removal Button: With a single click, Beautyplus AI will automatically detect and remove the background.
- Customize the Result: Choose from various background options or upload a new one to complete your portrait.
Comparison of Background Removal Tools
| Feature | Beautyplus AI | Other Tools |
|---|---|---|
| Speed | Instant | Varies |
| Precision | High (AI-based) | Medium to Low |
| Customization | Wide variety of options | Limited options |
Mastering AI-Powered Facial Adjustments: From Eye Enlargement to Nose Shaping
AI-based photo editors have revolutionized the way we enhance facial features in portraits. These advanced tools allow users to modify various aspects of their face with precision, from enlarging eyes to reshaping the nose, all through intuitive interfaces. With the right adjustments, you can create a more symmetrical and visually appealing image, tailored to your personal preferences or stylistic choices.
In this guide, we'll explore some of the most popular facial adjustments available in AI-powered photo editing apps. We will focus on the techniques that can dramatically alter facial features, making them appear sharper, more defined, or even more proportional. From subtle tweaks to bold changes, AI-driven adjustments open up endless possibilities for self-expression through digital images.
Key Adjustments to Enhance Facial Features
- Eye Enlargement: AI tools can enlarge the eyes, giving them a more expressive and striking look. This adjustment is often used to emphasize the eyes, making them appear more awake and engaging.
- Nose Reshaping: Subtle reshaping of the nose can be done with AI, offering a smoother profile, reducing the appearance of bumps, or refining the nostrils. This adjustment can make a significant difference in achieving facial harmony.
- Chin and Jawline Refining: AI can help define the chin and jawline by subtly enhancing or slimming the face. This is particularly popular for creating a more structured and balanced facial shape.
- Skin Smoothing: AI can reduce blemishes and imperfections, providing a flawless appearance without losing the natural texture of the skin.
Step-by-Step Guide to Facial Adjustments
- Upload Your Image: Choose a high-quality photo where facial features are clearly visible. AI performs better when it has a good baseline to work with.
- Select the Feature to Adjust: Most AI editors offer a range of tools like eye enlargement or nose shaping. Pick the feature you want to alter.
- Adjust the Intensity: Gradually increase or decrease the effect. The best results often come from subtle changes rather than extreme modifications.
- Fine-Tune and Review: After applying adjustments, zoom in and review the image to ensure everything looks natural. Adjust as needed.
- Save and Export: Once you're satisfied with the adjustments, save your image and export it in your desired format.
Comparison of Common Facial Adjustments
| Feature | Adjustment Type | Common Use Case |
|---|---|---|
| Eye Enlargement | Increase the size of the eyes | Enhancing expressiveness and attention |
| Nose Shaping | Refining the shape or profile of the nose | Creating a more harmonious look |
| Skin Smoothing | Reducing blemishes, wrinkles, and imperfections | Achieving a clearer complexion |
| Chin and Jawline Definition | Slimming or defining the chin/jaw | Enhancing facial structure |
Tip: Always preview the adjustments at 100% zoom to ensure that facial features retain their natural proportions and expression.
Step-by-Step Guide to Adjusting Filters for Various Lighting Conditions
Lighting plays a critical role in how photos appear, and using the right filter can significantly improve your images. When you use a photo editor like BeautyPlus, you can easily adjust filters to suit different lighting conditions. This guide will take you through a few essential steps to ensure your photos always look their best, no matter the environment or time of day.
Understanding how light interacts with your image is key. Whether you are shooting in daylight, indoors with artificial lighting, or in low-light environments, customizing filters can help to enhance the overall mood and clarity of your photo. Below is a detailed step-by-step process for customizing filters based on lighting situations.
1. Preparing the Image for Filter Application
- Open the photo in the BeautyPlus editor.
- Assess the current lighting of the photo (natural light, artificial light, or low light).
- Crop or straighten the image if necessary to ensure the focus is correct.
2. Adjusting the Filter for Daylight
When your photo is taken in natural light, you may want to enhance the vibrancy and clarity of the colors without over-saturating them.
- Select a filter with a natural tone, such as "Bright" or "Vivid."
- Adjust the strength of the filter to enhance brightness without distorting the colors.
- Fine-tune the temperature to balance warm or cool tones depending on the time of day.
3. Adapting Filters for Artificial Lighting
For photos taken under artificial lighting, the colors might appear yellowish or overly warm. To correct this, use filters designed to neutralize these tones.
- Choose filters with cooler tones like "Cool" or "Neutral."
- Lower the filter strength slightly to maintain natural skin tones and background colors.
- Adjust the contrast to reduce harsh shadows caused by artificial light sources.
4. Customizing Filters for Low-Light Photos
In low-light conditions, photos often appear grainy or too dark. Enhancing brightness and clarity will help achieve a cleaner and brighter result.
- Choose filters designed for low-light enhancement, such as "Night" or "Luminous."
- Increase brightness to make the image clearer.
- Adjust the exposure slightly to reduce the shadows and highlight details.
5. Additional Tips for Fine-Tuning Filters
| Lighting Condition | Recommended Filter | Adjustments |
|---|---|---|
| Daylight | Vivid or Bright | Increase vibrance, adjust temperature based on time of day. |
| Artificial Light | Cool or Neutral | Lower saturation, balance contrast. |
| Low Light | Night or Luminous | Increase exposure, adjust clarity, reduce noise. |
Important: Always experiment with different settings until you find the perfect balance for each lighting situation. The goal is to enhance the photo while preserving natural textures and tones.
Enhancing Image Quality with AI-Driven Noise Reduction and Sharpness Improvement
AI-powered tools like BeautyPlus Photo Editor provide advanced techniques for optimizing the quality of photographs, focusing on two critical aspects: noise reduction and sharpness enhancement. Noise is commonly introduced in low-light conditions, resulting in grainy, less detailed images. Meanwhile, sharpness plays a significant role in highlighting fine details and improving the overall clarity of the photo. These AI technologies automatically detect areas of noise and blur, applying specific algorithms to smooth out imperfections and enhance the sharpness without compromising the image’s natural look.
By utilizing deep learning algorithms, these tools can identify unwanted noise pixels and adjust the image to create smoother transitions between colors and textures. This results in a cleaner and more professional look, particularly useful for portraits, landscape photography, or any other detail-sensitive shots.
Key Features of AI Noise Reduction and Sharpness Enhancement
- Noise Detection: AI algorithms analyze the image to detect grainy patterns caused by low light or high ISO settings.
- Smart Filtering: The system automatically applies noise reduction filters to affected areas while preserving important details.
- Sharpness Optimization: AI algorithms enhance sharpness by adjusting the edges and fine details in the image, ensuring clarity without over-processing.
AI noise reduction improves the image quality by focusing on reducing grainy areas while maintaining the original texture and color depth of the photograph.
How It Works: AI Techniques for Image Enhancement
- Image Pre-Processing: Initial analysis to detect noise patterns and identify regions needing enhancement.
- Noise Reduction: AI applies noise reduction algorithms based on image type (e.g., portrait, landscape) to smooth out the grainy areas.
- Sharpness Adjustment: The AI boosts sharpness in specific image regions, making fine details stand out, such as textures, eyes, and edges.
Impact on Photography
These AI improvements are particularly noticeable when viewing high-resolution images, where even minor noise or blurriness can affect the overall presentation. The enhanced sharpness not only elevates the image's visual appeal but also increases the amount of detail that is perceptible. This makes AI-driven tools invaluable for professional photographers and hobbyists alike who aim to improve their image quality effortlessly.
| Feature | Impact |
|---|---|
| Noise Reduction | Improves image clarity by removing grain and preserving textures. |
| Sharpness Enhancement | Brings out fine details, providing a more detailed and crisp image. |
How to Save and Share Your Edited Photos in High Resolution
Once you've finished editing your photo in the Beautyplus AI Photo Editor, it's important to save and share it in the highest possible quality. The app offers several ways to ensure that your final image retains all of its detailed adjustments and improvements. This is essential for maintaining the clarity and sharpness of the photo when you share it with others, either online or for printing purposes.
There are different methods for saving and sharing your photo, and depending on your needs, you can choose the most appropriate one. Whether you want to save it directly to your device or share it on social media platforms, following these steps ensures that you won't lose any resolution during the process.
Steps to Save Photos in High Resolution
- Choose the Highest Quality Option: Before saving, make sure to select the highest resolution available in the settings.
- Enable High-Res Export: In the app's export options, select the "High Resolution" setting to avoid compression that may reduce image quality.
- Save to Your Device: Tap the "Save" button, and your photo will be stored directly on your phone or device in full resolution.
Sharing Edited Photos with Optimal Quality
- Select the Platform: Choose whether you want to share via social media, email, or cloud services.
- Check the Platform's Settings: Some platforms may automatically compress images. Before uploading, ensure the platform allows for high-res uploads.
- Use Direct Links for Cloud Storage: If sharing through cloud storage services, consider using shareable links to maintain full resolution.
Always double-check your settings for resolution, especially when sharing photos through social media, as they often reduce the image quality for faster loading times.
Summary Table
| Action | Effect on Resolution |
|---|---|
| Save directly to device | Retains original quality |
| Share via social media | Possible compression (check platform settings) |
| Use cloud storage links | Preserves high resolution |
Exploring Subscription Plans and Unlocking Premium Features in Beautyplus Ai
Beautyplus Ai offers various subscription plans designed to enhance user experience with advanced editing tools and premium features. These plans unlock more customization options, higher-quality output, and a smoother editing experience. To choose the best option, users should consider their editing needs, frequency of use, and the specific features they want to access.
Each subscription tier provides different levels of access to exclusive tools such as AI-powered skin smoothing, advanced filters, and background editing features. Below is a breakdown of the available plans and the features included with each one.
Subscription Plans
| Plan Type | Features | Price |
|---|---|---|
| Free | Basic photo editing, limited filters | Free |
| Premium Monthly | Full access to all features, no ads, priority support | $9.99/month |
| Premium Yearly | Full access to all features, no ads, priority support | $49.99/year |
Key Features of Premium Subscription
- AI Portrait Enhancer: Automatically improves skin texture and lighting for a flawless look.
- Advanced Filters: Access to exclusive, professionally-designed filters and effects.
- Background Removal Tool: Easily erase and replace backgrounds with just one click.
- High-Resolution Output: Save images in higher resolutions for professional use.
How to Unlock Premium Features
- Open the Beautyplus Ai app and navigate to the settings menu.
- Select the "Upgrade" option to view available subscription plans.
- Choose the desired plan and follow the payment process to unlock all premium features.
- Once the subscription is activated, you can access the advanced tools directly from the app's editing interface.
Note: Some features, such as the background removal and high-resolution output, are only available with the Premium subscription. The free version includes basic editing tools and ads.