Fooocus Ai Face Swap
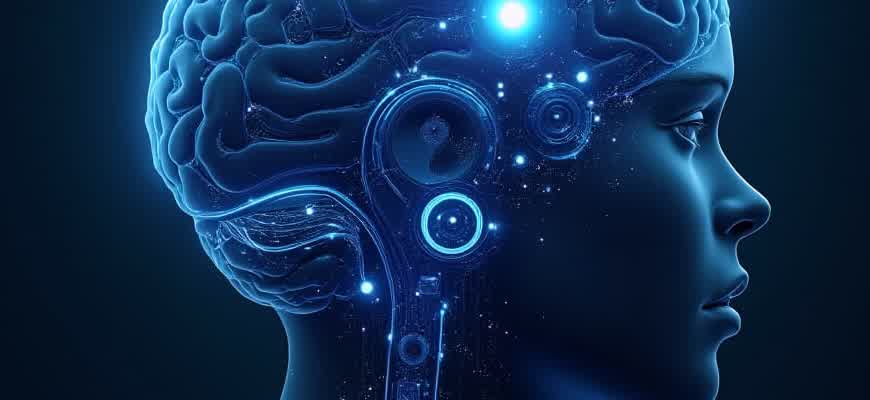
Artificial intelligence has dramatically transformed digital content creation, and one of the most fascinating advancements is the ability to swap faces with incredible accuracy. AI-powered face swapping tools, like the Fooocus Face Swap, have revolutionized the way we interact with photos and videos, allowing users to seamlessly alter faces in real-time. This innovation not only serves entertainment purposes but has broader implications in industries like advertising, entertainment, and social media.
Here are some key features and benefits of AI-driven face swapping technology:
- High-quality image transformation with minimal distortion.
- Real-time face swapping during video streams.
- Customizable settings for varying levels of effect intensity.
Important Note: Face swapping should be used responsibly, especially when dealing with personal data or public personas.
“AI-based face swapping tools offer both creative possibilities and ethical challenges. While they enhance digital interaction, their misuse can lead to privacy issues and misinformation.”
For those looking to integrate face swapping into their projects, the process is straightforward. Most platforms provide user-friendly interfaces, requiring only a few steps to get started:
- Upload the source image or video.
- Select the target face you wish to replace.
- Adjust settings, such as blending or color correction.
- Download or share the final result.
The integration of AI in digital content creation continues to open up new avenues for both professional creators and casual users, making it an exciting field to explore.
| Feature | Description |
|---|---|
| Accuracy | Advanced algorithms ensure realistic and detailed face swaps. |
| Speed | Instant processing allows for quick face swapping even during live video streams. |
| Customization | Flexible settings for tailoring the output to the user's preference. |
Step-by-Step Guide: Uploading Your Image to Fooocus Ai
Uploading your image to Fooocus Ai is a simple process that allows you to get started with face-swapping and other advanced image manipulations. The platform offers an intuitive interface, ensuring users can navigate through the process easily. In this guide, we will walk you through the necessary steps to upload your image and begin working with Fooocus Ai.
Before you start, ensure your image is in a compatible format, such as .jpg, .png, or .jpeg, and does not exceed the platform’s size limitations. Once you have your image ready, follow the instructions below to upload it seamlessly.
Steps to Upload Your Image
- Open the Fooocus Ai Platform: Go to the official Fooocus Ai website and log into your account.
- Navigate to the Upload Section: On the main dashboard, find and click the "Upload Image" button.
- Select Your Image: A file selection dialog will appear. Browse through your computer’s files and choose the image you want to upload.
- Confirm Upload: Once your image is selected, click "Open" to upload the image to Fooocus Ai.
- Adjust Settings (Optional): Before starting the manipulation, you can fine-tune some image settings such as resolution and face detection options.
- Complete Upload: After adjusting any settings, click the "Start Processing" button to begin working with your image.
Important: Make sure that your internet connection is stable during the upload process to prevent any interruptions or failures.
Image Upload Details
| File Format | JPG, PNG, JPEG |
|---|---|
| Max File Size | 10 MB |
| Resolution | Up to 4000x4000 px |
Now your image is ready to be used for face-swapping or any other transformations that Fooocus Ai offers. Follow these easy steps, and you'll be up and running in no time!
Optimizing Face Swap Results: Tips for Best Image Quality
When performing a face swap, achieving high-quality results requires careful attention to various factors. Whether you are using a specialized tool or an AI-powered application, the accuracy and realism of the final image depend on several key elements, such as resolution, lighting, and facial alignment. By following the right steps, you can improve the final output and ensure that the swapped face blends seamlessly with the original image.
Here are a few tips to help optimize your face swap for the best quality and realism:
1. Use High-Resolution Images
Start with high-resolution photos for both the source and target faces. This provides more data for the AI to work with, reducing pixelation and improving overall detail.
2. Pay Attention to Lighting
Lighting plays a significant role in making the face swap look realistic. Ensure both faces are captured under similar lighting conditions to avoid noticeable discrepancies in shadows and highlights.
3. Align Faces Properly
Before performing the swap, carefully align the faces. Misalignment can lead to unnatural results, with the face appearing slightly tilted or out of proportion.
4. Adjust Skin Tones and Textures
Minor adjustments to skin tones and textures can help make the face swap more believable. AI tools often allow for fine-tuning these elements to ensure that the swapped face matches the rest of the image.
Key Points to Keep in Mind:
- Resolution: Higher resolution images lead to better results.
- Lighting: Consistent lighting ensures a smoother face swap.
- Facial Alignment: Proper alignment avoids awkward or mismatched results.
- Post-Editing: Don't shy away from small tweaks in post-processing.
5. Use AI Face Swapping Tools with Smart Blending Features
AI-powered tools with advanced blending algorithms can automatically adjust facial features to match the overall image composition. This reduces the need for manual corrections and enhances the overall quality.
6. Test and Review the Output
After performing the face swap, always review the output carefully. Look for any inconsistencies such as unnatural borders, color mismatches, or alignment issues. These can often be corrected with minor adjustments.
Tip: Always save an unedited version of the original images in case you need to start over.
Recommended Settings for Optimal Results
| Setting | Recommended Value |
|---|---|
| Image Resolution | Minimum 300 DPI |
| Lighting Condition | Soft, even lighting (avoid harsh shadows) |
| Alignment Precision | Ensure 100% alignment of key facial features (eyes, nose, mouth) |
Customizing Face Swap Features: How to Adjust Expressions and Angles
When using face-swapping technologies, fine-tuning facial expressions and angles can significantly improve the realism and overall quality of the result. Many tools allow users to adjust these settings to match the specific mood or angle of the subject in the swapped image. Adjusting facial features such as the mouth, eyes, or overall facial positioning helps create a seamless transition between the original face and the target. Below is a guide to customizing these elements in face swap applications.
Most face-swap tools have sliders or buttons designed to modify expressions, such as smiles, frowns, or neutral faces. Additionally, adjusting the angle of the face can help match the perspectives of both images, ensuring a more natural appearance. Users can apply these customizations step by step, making sure to preview the changes to achieve the most realistic outcome.
Adjusting Facial Expressions
- Smile and Emotion Control: Use sliders to control the intensity of the smile or expression. Subtle adjustments can make the difference between a stiff or lifelike expression.
- Eye Movements: Position the eyes to match the direction of the gaze in the original image. This ensures the face doesn't appear out of sync.
- Face Shape and Contours: Fine-tune the shape of the face to better match the target face’s structure, adjusting for symmetry and proportion.
Angle Customization Techniques
- Horizontal Angle Adjustment: Rotate the face left or right to match the angle in the target image.
- Vertical Positioning: Adjust the pitch of the face, whether upward or downward, to align with the original's perspective.
- Depth Adjustment: Use depth controls to shift the face forward or backward, improving the depth relationship with the background and other objects in the image.
Note: It's essential to continuously preview changes during customization to ensure the adjusted facial features align naturally with the original subject's face and environment.
Quick Comparison of Customization Options
| Feature | Adjustment Type | Effect |
|---|---|---|
| Facial Expression | Smile, eye direction, overall expression | Enhances emotional realism |
| Face Angle | Horizontal and vertical rotation | Improves alignment with target face's orientation |
| Depth and Position | Adjustments in depth or forward/backward movement | Creates a natural spatial relationship with background |
Advanced Settings in Fooocus Ai: Creating Hyper-Realistic Faces
Fooocus Ai offers a powerful suite of advanced settings that enable users to craft hyper-realistic faces with impressive detail. By adjusting various parameters, users can control everything from facial structure to lighting, achieving an unprecedented level of photorealism. These settings allow for fine-tuning, ensuring that each generated face looks as lifelike as possible, while maintaining flexibility for artistic adjustments.
The software provides an intuitive interface for adjusting key factors that influence realism. From skin texture to eye reflections, every element can be altered to match the user's vision. With the proper tweaks, a user can simulate realistic expressions, aging effects, and even specific lighting conditions that give depth and authenticity to the generated face.
Key Features for Hyper-Realistic Face Creation
- Detail Enhancer: Increases the clarity of facial features, adding depth to textures such as skin pores and wrinkles.
- Skin Tone Adjustments: Allows for precise tuning of skin color, making it possible to replicate any ethnicity or individual’s complexion.
- Lighting Simulation: Provides control over different lighting conditions, which affects how shadows and highlights appear on the face.
- Expression Control: Enables manipulation of facial expressions to achieve realistic emotions, from subtle smiles to complex frowns.
Steps to Maximize Realism
- Start by selecting a base image and adjust the Skin Tone Adjustments to match the desired complexion.
- Fine-tune the Detail Enhancer to bring out small textures like pores, wrinkles, and hairlines.
- Experiment with Lighting Simulation to adjust shadows and reflections, ensuring the face looks natural in various environments.
- Use Expression Control to add a dynamic element, ensuring the generated face conveys the intended emotion or expression.
Additional Tips for Best Results
Start with high-quality source images for the best output. Low-resolution images can result in unnatural or blurry details, diminishing the effectiveness of the advanced settings.
Face Customization Settings Overview
| Setting | Description | Impact on Realism |
|---|---|---|
| Detail Enhancer | Improves fine details like pores, textures, and wrinkles | Significantly enhances realism by adding lifelike detail |
| Skin Tone Adjustments | Fine-tunes the color of the skin to match real-world variations | Improves authenticity by matching skin color to real-world examples |
| Lighting Simulation | Adjusts the intensity and direction of light to simulate different environments | Increases realism by simulating natural lighting conditions |
| Expression Control | Modifies the face’s expression to convey emotions | Enhances realism by adding human-like expressions |
Handling Common Issues in Face Swap: Troubleshooting Tips
Face swapping can be a powerful tool, but like any technology, it comes with its own set of challenges. Issues such as mismatched skin tones, unrealistic blending, or poor alignment can often occur. To achieve the most seamless results, users need to be aware of common pitfalls and how to address them effectively.
While these problems can be frustrating, most of them have easy solutions that can be implemented quickly. Below are some tips and tricks to help you troubleshoot common face swap issues and ensure the highest quality output.
1. Misalignment of Faces
One of the most frequent problems with face swaps is the misalignment of facial features. This can happen if the software does not properly detect the landmarks of the faces being swapped. Here are some solutions:
- Ensure that both faces are well-lit and positioned straight to the camera.
- Manually adjust the facial landmarks in the software for better alignment.
- Try using a higher resolution image for more accurate face detection.
2. Skin Tone and Color Mismatch
Another issue that often arises is the difference in skin tone and color between the faces. This can make the swap look unnatural. Here's how to handle it:
- Use the color correction or blending tools in the software to match the tones.
- Apply a consistent lighting effect to both faces to ensure they blend better.
- If available, use AI-based skin tone adjustment features to automatically correct mismatches.
3. Blurry or Distorted Faces
If the faces appear blurry or distorted after the swap, it's often due to low-quality input images. Consider the following steps:
| Issue | Solution |
|---|---|
| Low-quality input images | Use high-resolution, clear images with minimal compression. |
| Inconsistent lighting | Ensure both images have similar lighting conditions. |
| Improper resizing | Resize faces without distorting them to maintain proportions. |
Tip: Always use images with clear, unobstructed faces for the best results. Avoid angles or facial expressions that are too extreme.
How Fooocus Ai Protects Your Privacy While Editing Faces
In today's digital age, privacy concerns are more prominent than ever, especially when it comes to AI-driven technologies. Fooocus Ai ensures that user data remains secure while providing advanced face-swapping capabilities. The platform takes privacy seriously, offering users the ability to edit faces without risking personal information leakage. Fooocus uses robust encryption protocols and processes all face swaps locally, meaning no sensitive data is sent to external servers.
Fooocus Ai's face-editing process is designed with user confidentiality in mind. From facial recognition to final image rendering, all data is processed in a way that ensures complete control over the content being edited. Below are key ways Fooocus Ai safeguards user privacy:
- Local Processing: All image manipulation occurs on the user's device, ensuring that no data leaves their system.
- End-to-End Encryption: Any data that needs to be transferred is encrypted with advanced protocols, preventing unauthorized access.
- Anonymous Usage: Users do not need to create accounts or provide personal information to use the tool, maintaining full anonymity.
“Fooocus Ai ensures that face editing is not only seamless but also safe, with robust measures in place to protect your privacy at all stages.”
Privacy Features Overview
| Feature | Benefit |
|---|---|
| Local Face Processing | Prevents any facial data from being transmitted over the internet. |
| Data Encryption | Protects sensitive information by making it unreadable to unauthorized users. |
| No Account Required | Enables users to remain fully anonymous while using the tool. |